


Back to Top
RV Window & Skylight Resealing: How to Remove Old Caulk Without Damage
April 22, 2025

Whether you're prepping for the fall rains or getting a jump on spring maintenance, resealing your RV windows and skylights is a crucial step in keeping your rig watertight and road-ready. But before you can reseal, you’ve got to remove the old caulk and doing that wrong can lead to costly scratches, gouges, or even water damage down the line.
The good news? With a little patience and the right tools, like a plastic scraper, you can safely remove old sealant without damaging your RV’s surfaces. Here’s how.
Why Old Caulk Needs to Go
Over time, the caulking and sealants around RV windows, roof vents, and skylights break down from sun, heat, cold, and movement on the road. You might notice cracks, discoloration, or even gaps where the sealant is pulling away. If left in place, these weak points can allow water to seep into your walls or ceiling, leading to rot, mold, and major headaches.
But before you slap on a fresh bead of caulk, it’s important to remove all of the old material. New sealant won’t adhere properly to dirty or deteriorating caulk and if you layer new over old, you’re more likely to trap moisture underneath.
Step-by-Step: Removing Old Caulk the Right Way
1. Clean the Area First
Use a gentle RV-safe cleaner to wash away dirt and debris from the area around the caulk line. This gives you a clearer view of the sealant you need to remove and prevents grit from scratching the surface during removal.
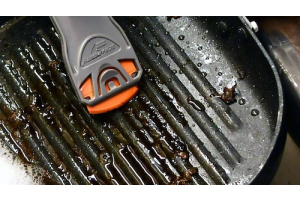
2. Use a Plastic Scraper to Loosen Edges
Once the surface is clean and dry, begin lifting the old caulk with a plastic scraper. Unlike metal blades, plastic scrapers are less likely to scratch your RV’s siding, window trim, or skylight dome.
Work slowly and hold the scraper at a low angle. You want to get under the edge of the sealant and gently pry it up in strips or chunks. For brittle, cracked sealant, this may take several passes.
3. Apply Gentle Heat if Needed
If the caulk is especially stubborn or rubbery, applying low heat can help soften it. Use a blow dryer or heat gun on a low setting, holding it several inches away from the surface. Warm the caulk for 20–30 seconds, then try scraping again. The heat helps break the bond between the caulk and the surface, making it easier to lift away in larger pieces.
Be cautious. Don’t overheat plastic trim or fiberglass and never use open flame.
4. Tackle Residue with Caution
After most of the caulk has been removed, there’s usually a sticky residue left behind. Don’t scrub aggressively as this can damage finishes. Instead, continue using the scraper to lift off as much as possible. If needed, follow up with a caulk remover or solvent approved for use on RV exteriors. Let it sit for a few minutes, then scrape again.
Important: Always test any solvent on an inconspicuous area to ensure it doesn’t damage the surface or discolor trim.
5. Clean and Prep for New Sealant
Once the area is free of old caulk and residue, clean it again to remove any remaining oils or debris. Let everything dry thoroughly. Now you’re ready to apply new sealant—whether you’re using self-leveling lap sealant on the roof or a silicone-based product around windows.
Wrap-Up: The Safe, Scratch-Free Tool for the Job
When resealing windows or skylights, a plastic scraper is one of the simplest but most important tools in your RV maintenance kit. It allows you to remove stubborn sealants without harming delicate exterior finishes, skylight domes, or window frames. For particularly delicate surfaces, look for plastic blades designed for gentle use—like those made from softer compounds that still resist chemical exposure and scraping wear.
If you're unsure which type of plastic blade works best with the solvents or cleaners you use, be sure to check out Scraperite's Blade Characteristics page for guidance on chemical compatibility and blade options. For example, our orange blades are engineered for safe use on sensitive surfaces and are highly resistant to chemicals like acetone, making them a smart choice for caulk removal on RVs.

Share on Facebook

Share on X

Share on Pinterest
0 Comment(s)
Recent Posts
